Category: Food

  • Summer Berry Charcuterie Board

    Summer Berry Charcuterie Board

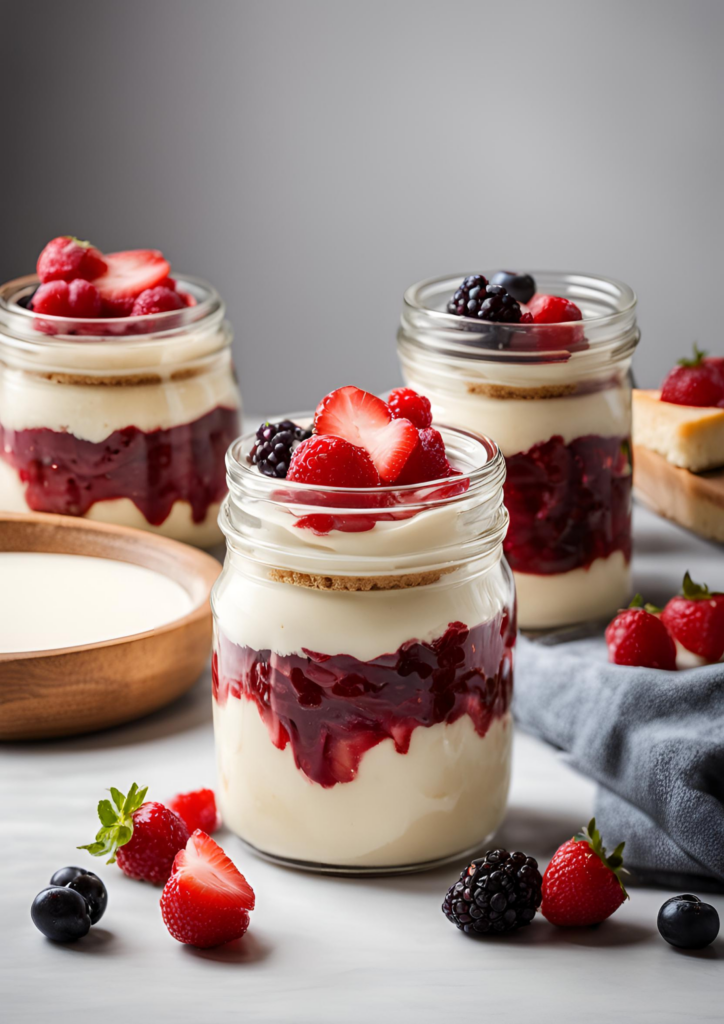
    Create the ultimate summer snack spread with this beautiful Summer Berry Charcuterie Board. Filled with fresh berries, creamy cheeses, crunchy crackers, and sweet additions, this board is perfect for picnics, backyard gatherings, brunches, or simply treating yourself to something special. It’s easy to assemble, incredibly delicious, and almost too pretty to eat.

    Introduction

    There is just something about a charcuterie board that makes any occasion feel a little more special. During the summer months, I love incorporating fresh seasonal fruit, especially berries, because they add beautiful color, natural sweetness, and a refreshing touch to any spread.

    This Summer Berry Charcuterie Board is one of my favorite things to make when I want something simple but impressive. Whether you’re hosting friends, planning a picnic, or enjoying a cozy night at home, this board comes together quickly and is always a crowd-pleaser.

    Why You’ll Love This Recipe

    Perfect for Summer

    Fresh berries are at their peak during summer, making this board vibrant, juicy, and full of seasonal flavor. The colorful presentation instantly brightens any gathering.

    Easy to Customize

    You can easily swap ingredients based on your preferences or what you have on hand. There are so many ways to make this board your own.

    No Cooking Required

    This recipe requires zero cooking, making it ideal for hot summer days. Simply arrange everything on a board and serve.

    Great for Entertaining

    Charcuterie boards are perfect for sharing and encourage everyone to gather around and enjoy. They also look incredibly beautiful with minimal effort.

    Ingredients You’ll Need

    Before we get started, let’s gather the ingredients:

    • Fresh strawberries, halved
    • Fresh blueberries
    • Fresh raspberries
    • Fresh blackberries
    • Brie cheese
    • Goat cheese
    • Sharp cheddar cheese cubes
    • Assorted crackers
    • Pretzels
    • Honey
    • Dark chocolate pieces
    • Mixed nuts (almonds, pecans, or walnuts)
    • Fresh mint leaves for garnish

    Instructions

    Step 1: Prepare Your Ingredients

    Wash and thoroughly dry all of the berries. Slice the strawberries in half and cut the cheeses into serving-sized pieces if needed.

    Step 2: Place the Larger Items First

    Arrange the Brie, goat cheese, and cheddar around your serving board. Placing the larger items first helps create a balanced layout.

    Step 3: Add the Crackers and Pretzels

    Fill in sections of the board with crackers and pretzels. This provides structure and makes the board easy to snack on.

    Step 4: Arrange the Berries

    Place small piles of strawberries, blueberries, raspberries, and blackberries around the board. Try to distribute the colors evenly for a beautiful presentation.

    Step 5: Fill Empty Spaces

    Add mixed nuts and dark chocolate pieces into any gaps on the board. These small additions provide extra flavor and texture.

    Step 6: Finish with Garnishes

    Drizzle honey over the Brie or place it in a small serving dish. Garnish the board with fresh mint leaves for a fresh summer touch.

    Benefits of a Summer Berry Charcuterie Board

    • Packed with antioxidants and vitamins from fresh berries
    • Easy to customize for different dietary preferences
    • Requires minimal preparation time
    • Perfect for entertaining guests or casual snacking
    • Offers a variety of sweet and savory flavors

    Tips for Building the Perfect Charcuterie Board

    • Choose berries that are fresh and in season for the best flavor.
    • Use a variety of textures by combining creamy cheeses, crunchy crackers, and juicy fruit.
    • Arrange ingredients in small groups to create a visually appealing board.
    • Prepare ingredients ahead of time and assemble just before serving.
    • Don’t be afraid to get creative with additional toppings and garnishes.

    Frequently Asked Questions

    Can I make this charcuterie board ahead of time?

    Yes. You can prep all the ingredients a few hours in advance and store them separately in the refrigerator. Assemble the board shortly before serving for the freshest presentation.

    What other fruits can I include?

    You can add grapes, cherries, peaches, or sliced nectarines for even more summer flavor. Feel free to mix and match your favorite seasonal fruits.

    Can I make this dairy-free?

    Absolutely. Simply substitute the cheeses with your favorite dairy-free alternatives. There are many delicious plant-based cheese options available.

    What crackers work best?

    Any crackers you enjoy will work well. I love using a combination of plain crackers, seeded crackers, and buttery varieties for extra texture.

    How long can the board sit out?

    It’s best enjoyed within two hours, especially if serving outdoors during warm weather. Keep it chilled until you’re ready to serve.

    Conclusion

    This Summer Berry Charcuterie Board is proof that simple recipes can still feel incredibly special. The combination of fresh berries, creamy cheeses, crunchy crackers, and sweet additions creates a beautiful balance of flavors and textures that everyone will love.

    Whether you’re hosting a summer gathering or simply treating yourself to an elevated snack moment, this board is easy to put together and guaranteed to impress. If you try this recipe, be sure to leave a comment below and let me know your favorite additions.

    Happy Eating!

    With Love,

  • High-Protein Breakfasts for Busy Mornings

    High-Protein Breakfasts for Busy Mornings

    Start your day strong with these 3 high-protein breakfasts that are quick, filling, and actually so good. Because let’s be real, busy mornings don’t mean you should skip breakfast or settle for something boring.


    Introduction

    Mornings can get so hectic, especially when you’re trying to balance school, work, workouts, and everything in between. I’ve definitely had those days where I’m running out the door with nothing but coffee… and then regretting it an hour later.

    That’s why I love having a few go-to high-protein breakfasts that are quick, easy, and keep me full. These recipes are perfect if you want something nourishing without spending forever in the kitchen.


    Why You’ll Love These Recipes

    Quick & Easy
    Each breakfast takes minimal time, so you can actually make it even on your busiest mornings.

    High in Protein
    They’ll keep you full, energized, and focused throughout your day.

    Simple Ingredients
    Nothing complicated—just real, easy-to-find ingredients.

    Perfect for On-the-Go
    You can prep ahead or take them with you if you’re in a rush.


    Ingredients You’ll Need

    Here’s everything you’ll need across all three recipes:

    • Eggs
    • Greek yogurt
    • Protein powder (optional)
    • Oats
    • Milk of choice
    • Chia seeds
    • Fresh fruits (berries, bananas)
    • Nut butter
    • Whole grain bread
    • Avocado

    Breakfast 1: Protein-Packed Overnight Oats

    Instructions

    Step 1: Mix the Ingredients

    In a jar or container, combine oats, milk, Greek yogurt, chia seeds, and protein powder.

    Step 2: Stir Well

    Mix everything until smooth and fully combined.

    Step 3: Chill Overnight

    Place in the fridge overnight (or at least 4 hours).

    Step 4: Add Toppings

    Top with fresh fruit and a drizzle of nut butter before serving.


    Breakfast 2: Egg & Avocado Toast

    Instructions

    Step 1: Toast the Bread

    Toast your whole grain bread until golden and crispy.

    Step 2: Cook the Eggs

    Cook eggs however you like—fried, scrambled, or poached.

    Step 3: Mash the Avocado

    Mash avocado with a pinch of salt and pepper.

    Step 4: Assemble

    Spread avocado on toast, top with eggs, and add any extra seasoning you love.


    Breakfast 3: Greek Yogurt Protein Bowl

    Instructions

    Step 1: Add the Base

    Scoop Greek yogurt into a bowl.

    Step 2: Mix in Protein

    Add protein powder if you want an extra boost and mix well.

    Step 3: Add Toppings

    Top with fruits, chia seeds, and nut butter.

    Step 4: Serve

    Enjoy immediately or take it to-go.


    Benefits of High-Protein Breakfasts

    • Helps keep you full longer
    • Supports muscle recovery and energy levels
    • Reduces mid-morning cravings
    • Helps you stay focused and productive

    Tips for Busy Mornings

    • Prep overnight oats the night before to save time
    • Keep ingredients stocked and ready to go
    • Use simple recipes you can make on autopilot
    • Don’t skip breakfast—even something small helps

    Frequently Asked Questions

    Can I make these ahead of time?
    Yes! Overnight oats are perfect for meal prep, and you can prep ingredients for the others in advance.

    Do I need protein powder?
    Not at all. It’s optional, but it can help increase your protein intake.

    What can I substitute for Greek yogurt?
    You can use dairy-free yogurt alternatives if needed.

    Are these good for weight loss?
    They can support weight goals since they help keep you full and reduce overeating later.


    Conclusion

    These 3 high-protein breakfasts are perfect for busy mornings when you still want to feel your best. They’re simple, nourishing, and honestly make mornings feel a little more put together.

    Try them out and see which one becomes your favorite! Don’t forget to leave a comment and share your go-to breakfast ideas too.

    Happy Eating 💗

    With Love,

  • The Easiest Lemon Herb Chicken That Feels So Put Together

    The Easiest Lemon Herb Chicken That Feels So Put Together

    Fresh, zesty, and full of flavor—this Grilled Lemon Herb Chicken with Roasted Vegetables is the perfect balance of clean eating and comfort food. Juicy, herb-marinated chicken paired with perfectly roasted, caramelized veggies? Yes please. It’s giving main character energy… but make it healthy.


    Introduction

    If you’re anything like me, you want meals that feel elevated but don’t take hours to make. This Grilled Lemon Herb Chicken with Roasted Vegetables is one of those go-to recipes I make when I want something nourishing, flavorful, and honestly… kinda pretty on the plate.

    Whether you’re meal prepping for the week, cooking for your family, or just trying to romanticize your dinner (because why not?), this recipe is simple, fresh, and so satisfying.


    Why You’ll Love This Recipe

    Fresh & Flavorful
    The lemon and herbs bring such a bright, clean flavor that makes this dish feel light but still super satisfying.

    Perfect for Meal Prep
    You can easily make a batch and have lunches or dinners ready for days.

    Balanced & Nourishing
    You’ve got protein, fiber, and tons of nutrients all in one plate.

    Easy but Elevated
    It looks like something you’d order at a cute café, but it’s actually so easy to make at home.


    Ingredients You’ll Need

    Before we get started, let’s gather everything:

    For the Chicken:

    • Boneless, skinless chicken breasts
    • Fresh lemon juice
    • Olive oil
    • Garlic (minced)
    • Fresh herbs (thyme, rosemary, or parsley)
    • Salt and pepper

    For the Roasted Vegetables:

    • Carrots (sliced)
    • Zucchini (chopped)
    • Bell peppers (sliced)
    • Red onion (cut into chunks)
    • Olive oil
    • Salt and pepper

    Instructions

    Step 1: Marinate the Chicken

    In a bowl, combine lemon juice, olive oil, garlic, fresh herbs, salt, and pepper. Add the chicken and let it marinate for at least 20–30 minutes (longer if you have time for extra flavor).

    Step 2: Preheat the Oven

    Preheat your oven to 400°F (200°C) so it’s ready for your vegetables.

    Step 3: Prepare the Vegetables

    Place your chopped vegetables on a baking sheet. Drizzle with olive oil, sprinkle with salt and pepper, and toss until evenly coated.

    Step 4: Roast the Vegetables

    Roast in the oven for about 20–25 minutes, or until they’re tender and slightly caramelized.

    Step 5: Grill the Chicken

    Heat a grill pan or outdoor grill over medium heat. Cook the chicken for about 5–7 minutes on each side, or until fully cooked and beautifully golden.

    Step 6: Assemble & Serve

    Plate your grilled chicken alongside the roasted vegetables. You can squeeze a little extra lemon on top for that fresh, zesty finish.


    Benefits of Grilled Lemon Herb Chicken & Roasted Vegetables

    • High in protein to keep you full and energized
    • Packed with vitamins and antioxidants from the vegetables
    • Naturally gluten-free and clean
    • Great for maintaining a balanced, healthy lifestyle

    Tips for Making the Perfect Dish

    • Let the chicken marinate longer for deeper flavor
    • Don’t overcrowd your veggies on the pan so they roast instead of steam
    • Use fresh herbs if possible—they make a big difference
    • Add a sprinkle of chili flakes if you want a little heat

    Frequently Asked Questions

    Can I bake the chicken instead of grilling it?
    Yes! You can bake it at 400°F (200°C) for about 20–25 minutes or until fully cooked.

    What other vegetables can I use?
    You can swap in broccoli, asparagus, or even sweet potatoes depending on what you have.

    Can I use dried herbs instead of fresh?
    Absolutely. Just use a bit less since dried herbs are more concentrated.

    How long can I store leftovers?
    Store in an airtight container in the fridge for up to 3–4 days.


    Conclusion

    This Grilled Lemon Herb Chicken with Roasted Vegetables is one of those recipes that just fits into your life—easy, healthy, and honestly so good. It’s perfect for busy days, slow evenings, or anytime you want something that feels both cozy and put-together.

    If you try this recipe, let me know how it turned out! Leave a comment and don’t forget to rate it.

    Happy Eating 💗

    With Love,

  • No-Bake Cheesecake Jars: The Perfect Sweet Treat

    No-Bake Cheesecake Jars: The Perfect Sweet Treat

    If you’re a fan of cheesecake but dread the complicated baking process, you’re in for a treat! These No-Bake Cheesecake Jars are the ultimate dessert solution – easy to make, deliciously creamy, and perfect for any occasion. Whether you’re hosting a dinner party, bringing a dessert to a potluck, or just craving something sweet, these cheesecake jars are sure to impress. Let’s dive into the recipe and discover how to whip up this delightful treat with minimal effort!

    Why You’ll Love These No-Bake Cheesecake Jars

    • No Baking Required: Say goodbye to the oven! These cheesecake jars come together without any baking, making them a breeze to prepare.
    • Customizable: You can personalize these jars with your favorite toppings – from fresh fruits to chocolate shavings or even a drizzle of caramel.
    • Make-Ahead Friendly: Perfect for busy days, you can prepare these cheesecake jars in advance and store them in the fridge until you’re ready to enjoy.

    Ingredients You’ll Need

    For the crust:

    • 1 1/2 cups graham cracker crumbs
    • 1/4 cup melted butter
    • 2 tablespoons granulated sugar

    For the cheesecake filling:

    • 16 oz cream cheese, softened
    • 1/2 cup granulated sugar
    • 1 teaspoon vanilla extract
    • 1 cup heavy whipping cream

    For the topping:

    • Fresh berries (strawberries, blueberries, raspberries)
    • A handful of crushed graham crackers
    • Optional: chocolate shavings, caramel sauce, or a sprinkle of powdered sugar

    Instructions

    Step 1: Prepare the Crust

    1. Mix the Crust Ingredients: In a medium bowl, combine the graham cracker crumbs, melted butter, and sugar. Stir until the mixture is well combined and has a sandy texture.
    2. Fill the Jars: Divide the crumb mixture evenly among your serving jars or glasses. Press the crumbs down with the back of a spoon to form a compact crust layer.

    Step 2: Make the Cheesecake Filling

    1. Beat the Cream Cheese: In a large bowl, beat the softened cream cheese, granulated sugar, and vanilla extract until smooth and creamy. You can use a hand mixer or a stand mixer on medium speed.
    2. Whip the Cream: In a separate bowl, whip the heavy cream until stiff peaks form. This usually takes about 3-4 minutes on medium-high speed.
    3. Combine the Mixtures: Gently fold the whipped cream into the cream cheese mixture until fully combined. Be careful not to deflate the whipped cream.

    Step 3: Assemble the Cheesecake Jars

    1. Layer the Filling: Spoon the cheesecake filling over the crust in each jar, smoothing the top with a spatula.
    2. Chill: Refrigerate the jars for at least 4 hours, or until the cheesecake filling is set.

    Step 4: Add the Toppings

    1. Add Fresh Berries: Just before serving, top each jar with a handful of fresh berries and a sprinkle of crushed graham crackers. If you’re feeling fancy, add some chocolate shavings, a drizzle of caramel sauce, or a dusting of powdered sugar.

    Tips for the Perfect Cheesecake Jars

    • Room Temperature Ingredients: Make sure your cream cheese is at room temperature for the smoothest filling. This helps it blend seamlessly with the other ingredients.
    • Whipped Cream Whip: Whipping the cream to stiff peaks is crucial for a light and airy texture. Don’t rush this step!
    • Topping Variations: Get creative with your toppings! Try crushed Oreos, a spoonful of fruit compote, or even a sprinkle of toasted coconut flakes.

    FAQ

    Can I use a different type of cookie for the crust besides graham crackers?

    • Yes, absolutely! You can use crushed Oreos, digestive biscuits, or any other type of cookie you prefer for the crust. Adjust the amount of butter accordingly to achieve the right texture.

    How long can I store these cheesecake jars in the refrigerator?

    • These cheesecake jars can be stored in the refrigerator for up to 3-4 days. Make sure to cover them tightly with plastic wrap or lids to prevent any odors from affecting the flavor.

    Can I freeze these cheesecake jars?

    • It’s not recommended to freeze these cheesecake jars as the texture of the cheesecake filling may change upon thawing. They are best enjoyed fresh from the refrigerator.

    Can I make these cheesecake jars ahead of time for a party?

    • Yes, these cheesecake jars are perfect for making ahead of time. Prepare them up to 24 hours in advance and keep them chilled in the refrigerator until you’re ready to serve. Add the toppings just before serving for the best presentation.

    How can I adjust the sweetness of the cheesecake filling?

    • If you prefer a sweeter cheesecake filling, you can increase the amount of granulated sugar in the filling mixture. Taste the filling before assembling the jars and adjust according to your preference. Remember, the sweetness of the crust and toppings will also affect the overall taste.

    Conclusion

    These No-Bake Cheesecake Jars are not just easy to make; they’re also incredibly delicious and visually appealing. Perfect for any occasion, they’re a sweet treat that everyone will love. So, gather your ingredients, get those jars ready, and let’s make some cheesecake magic! Don’t forget to share your creations with us – we’d love to see how you decorate your jars. Happy baking!

    With Love,

  • Veggie Quesadillas: A Burst of Flavor in Every Bite

    Veggie Quesadillas: A Burst of Flavor in Every Bite

    Introduction:

    Who doesn’t love the sizzle of a quesadilla cooking on the stovetop, filling the kitchen with irresistible aromas? While the classic cheese quesadilla holds a special place in our hearts, why not take it up a notch with an explosion of colors and flavors? Enter the veggie quesadilla—a delightful twist on the traditional favorite that adds a healthy dose of nutrients and a burst of freshness to every bite. In this blog post, we’ll show you how to whip up these mouthwatering treats in no time, combining gooey cheese with a rainbow of vibrant vegetables for a quesadilla experience like no other.

    Ingredients:

    Before we dive into the recipe, let’s gather our ingredients:

    • Flour tortillas
    • Shredded cheese (cheddar, Monterey Jack, or a blend)
    • Assorted colorful vegetables (bell peppers, onions, tomatoes, spinach, mushrooms, etc.)
    • Olive oil
    • Optional: avocado, salsa, sour cream, cilantro for topping

    Instructions:

    Prepare the Vegetables:

    • Wash and chop your vegetables into bite-sized pieces.
    • Heat a skillet over medium heat and add a drizzle of olive oil.
    • Sauté the vegetables until they are tender-crisp and lightly caramelized. Season with salt and pepper to taste.

    Assemble the Quesadillas:

    • Place a flour tortilla on a clean work surface.
    • Sprinkle a generous amount of shredded cheese evenly over half of the tortilla.
    • Spoon the sautéed vegetables on top of the cheese, distributing them evenly.
    • If desired, add slices of avocado or a dollop of salsa for extra flavor.

    Cook the Quesadillas:

    • Fold the tortilla in half to cover the filling, creating a half-moon shape.
    • Heat a non-stick skillet over medium heat and add a drizzle of olive oil.
    • Carefully transfer the assembled quesadilla to the skillet and cook until golden brown and crispy on both sides, about 2-3 minutes per side.

    Serve and Enjoy:

    • Once the quesadilla is cooked to perfection and the cheese is melted and gooey, remove it from the skillet.
    • Use a sharp knife or pizza cutter to slice the quesadilla into wedges.
    • Serve hot, garnished with a dollop of sour cream, a sprinkle of fresh cilantro, and additional salsa on the side for dipping.

    Benefits of Veggie Quesadillas:

    • Not only are veggie quesadillas a feast for the taste buds, but they also offer a plethora of health benefits:
    • Packed with nutrients: Colorful vegetables provide essential vitamins, minerals, and antioxidants that support overall health and well-being.
    • High in fiber: Vegetables add fiber to your diet, aiding in digestion and promoting a feeling of fullness and satisfaction.
    • Lower in calories: Compared to meat-filled quesadillas, veggie quesadillas are lower in calories and saturated fats, making them a lighter and healthier option.
    • Versatile and customizable: You can customize your veggie quesadillas with your favorite vegetables and experiment with different flavor combinations to suit your taste preferences.

    FAQs (Frequently Asked Questions):

    • Can I use frozen vegetables instead of fresh ones?

    Yes, frozen vegetables can be used as a convenient alternative. Just make sure to thaw and drain them before sautéing to prevent excess moisture in your quesadillas.

    • Can I make veggie quesadillas ahead of time?

    While quesadillas are best enjoyed fresh off the skillet, you can prepare the vegetable filling in advance and assemble the quesadillas just before cooking. Store any leftovers in an airtight container in the refrigerator and reheat in a skillet or oven until warmed through.

    • Are veggie quesadillas suitable for vegetarians and vegans?

    Absolutely! Veggie quesadillas are a perfect option for vegetarians. For vegans, simply use dairy-free cheese or omit the cheese altogether and load up on your favorite veggies for a delicious plant-based meal.

    • Can I add meat to my veggie quesadillas?

    Of course! Feel free to customize your quesadillas by adding cooked chicken, steak, shrimp, or any other protein of your choice. Simply cook the meat separately and add it to the quesadillas along with the vegetables and cheese.

    • What are some alternative toppings for veggie quesadillas?

    Get creative with your toppings! Try adding sliced jalapeños, diced onions, fresh cilantro, guacamole, or Greek yogurt for extra flavor and texture. Experiment with different sauces like hot sauce, chipotle mayo, or salsa verde to elevate your quesadilla game.

    Conclusion:

    Veggie quesadillas are the perfect fusion of flavor, freshness, and fun, offering a delicious way to incorporate more vegetables into your diet. Whether enjoyed as a quick and easy weeknight dinner, a crowd-pleasing party appetizer, or a satisfying afternoon snack, these colorful creations are sure to delight your taste buds and nourish your body from the inside out. So grab your tortillas, cheese, and veggies, and get ready to savor the irresistible goodness of veggie quesadillas—it’s a culinary adventure you won’t want to miss!

    With Love,

  • 3 Vegan Lunch Ideas for Broke College Students

    3 Vegan Lunch Ideas for Broke College Students

    #image_title

    Introduction

    Navigating the world of veganism on a college budget can be challenging, but with a little creativity and resourcefulness, it’s entirely possible to enjoy delicious and nutritious meals without breaking the bank. Whether you’re a seasoned vegan or just starting to explore plant-based eating, these three budget-friendly lunch ideas are sure to satisfy your taste buds and keep your wallet happy.

    Why You’ll Love these Recipes

    Budget-Friendly Ingredients: These recipes are designed with the college student’s budget in mind. They utilize affordable ingredients that are easy to find at any grocery store or market, allowing you to enjoy delicious vegan meals without breaking the bank.

    Quick and Easy Preparation: With busy schedules and limited time between classes, these recipes are perfect for students who need a quick and hassle-free meal option. They require minimal prep work and cooking time, so you can whip them up in a flash and get back to studying or socializing.

    Nutritious and Filling: Despite their simplicity, these recipes are packed with nutrients and flavor. From protein-packed chickpeas to fiber-rich vegetables, each ingredient provides essential vitamins and minerals to keep you feeling satisfied and energized throughout the day.

    Customizable Options: Feel free to get creative and personalize these recipes to suit your taste preferences and dietary needs. Whether you prefer extra spice in your stir-fry or additional toppings in your wrap, these recipes serve as a versatile foundation for endless culinary experimentation.

    Portable and On-the-Go: Perfect for taking to campus or enjoying between classes, these recipes are conveniently portable and easy to pack in your backpack or lunch bag. Say goodbye to expensive cafeteria meals or unhealthy fast food options – these homemade lunches are both wholesome and convenient.

    1. Chickpea Salad Sandwich

    Ingredients:

    • 1 can of chickpeas, drained and rinsed
    • 2 tablespoons of vegan mayonnaise
    • 1 tablespoon of Dijon mustard
    • 2 tablespoons of chopped celery
    • 2 tablespoons of diced red onion
    • Salt and pepper to taste
    • Bread or sandwich rolls

    Instructions:

    • In a mixing bowl, mash the chickpeas with a fork until they reach your desired consistency.
    • Add vegan mayonnaise, Dijon mustard, chopped celery, diced red onion, salt, and pepper to the mashed chickpeas. Mix until well combined.
    • Spread the chickpea salad onto bread or sandwich rolls to make sandwiches.
    • Serve with your favorite sandwich toppings, such as lettuce, tomato, avocado, or sprouts.

    2. Veggie Stir-Fry with Rice

    Ingredients:

    • 1 cup of cooked rice (white, brown, or jasmine)
    • 1 cup of mixed frozen vegetables (such as carrots, peas, corn, and bell peppers)
    • 2 tablespoons of soy sauce or tamari
    • 1 tablespoon of sesame oil
    • 1 clove of garlic, minced
    • 1 teaspoon of grated ginger (optional)
    • Sriracha or chili flakes for heat (optional)
    • Chopped green onions for garnish (optional)

    Instructions:

    • In a large skillet or wok, heat sesame oil over medium heat. Add minced garlic and grated ginger (if using) and sauté for 1-2 minutes until fragrant.
    • Add mixed frozen vegetables to the skillet and stir-fry for 5-7 minutes until they are heated through and slightly tender.
    • Stir in cooked rice and soy sauce or tamari. Continue to cook for another 2-3 minutes, stirring occasionally, until the rice is heated through and evenly coated with the sauce.
    • Remove from heat and season with sriracha or chili flakes for heat, if desired. Garnish with chopped green onions before serving.

    3. Avocado and Black Bean Wrap

    Ingredients:

    • 1 large tortilla wrap (whole wheat or gluten-free)
    • 1/2 ripe avocado, mashed
    • 1/4 cup of canned black beans, drained and rinsed
    • 2 tablespoons of salsa
    • Handful of spinach leaves
    • Salt and pepper to taste

    Instructions:

    • Lay the tortilla wrap flat on a clean surface. Spread mashed avocado evenly over the surface of the wrap.
    • Layer black beans, salsa, and spinach leaves on top of the mashed avocado.
    • Season with salt and pepper to taste.
    • Roll up the tortilla tightly, tucking in the sides as you go, to create a wrap.
    • Slice the wrap in half diagonally and serve immediately, or wrap it in foil or parchment paper to take it on the go.

    Conclusion:

    Eating vegan on a college budget doesn’t have to be bland or boring. With a little creativity and some affordable ingredients, you can whip up delicious and satisfying meals that are good for you and easy on your wallet. These three vegan lunch ideas are just the beginning – feel free to customize them with your favorite ingredients and get creative in the kitchen!

    Happy Eating!

    With Love,