Blog

  • How to Make the Best Vegan Chicken and Waffles

    How to Make the Best Vegan Chicken and Waffles

    Disclaimer: As an Amazon affiliate, I earn from qualifying purchases made through links provided in this post. This comes at no additional cost to you, but it helps support my blog and allows me to continue creating content. Thank you for your support!

    Why You’ll Love This Vegan Chicken and Waffles Recipe

    Chicken and waffles are one of the best breakfast pairings ever! This Southern-style classic combines crispy “chicken” with fluffy waffles, delivering a delightful symphony of flavors. Nonetheless, whether you’re a seasoned plant-based pro or just exploring the wonders of vegan eats, this recipe is a winner for several reasons:

    • Delightfully flavorful – Every bite is a burst of savory and sweet goodness that’ll have you coming back for more.
    • Quick and easy to make – No need for a culinary marathon. With simple steps, you’ll have this delightful dish on your plate in no time.
    • Time-efficient – Perfect for busy mornings—get a tasty breakfast without the wait.
    • Satisfyingly filling – Keeps you full and fueled, ready to conquer the day.
    • Ideal for brunch – Elevate your brunch game with this crowd-pleaser that’s sure to impress.

    Ingredients

    The two main ingredients you’re going to need are waffle mix and oyster mushrooms. The waffle mix is for making the waffle batter (obviously, haha). I like to use Birch Benders Organic Classic Pancake and Waffle Mix, it’s one of my absolute favorites. Then, you’ll need oyster mushrooms to make the “fried chicken”. Any and all seasonings and toppings listed in this recipe can be customized to your liking. It’s totally up to you! Here’s the essentials:

    • Waffle Mix – Birch Benders Organic Classic is my go-to. However, you can use any brand you like, or you make the waffles from scratch.
    • King Oyster Mushrooms – These are best because their shape resembles chicken drumsticks.
    • Plant-Based Milk – I used unsweetened almond milk, but feel free to use any kind you like (oat milk, cashew milk, etc). This is used to create our ‘buttermilk”.
    • Lemon – You only need half of it.
    • Oil – For frying the mushrooms and the waffle batter.
    • Flour – To make batter for the mushrooms

    These seasonings will make your fried “chicken” aka oyster mushrooms super flavorful:

    These will make your waffles taste delicious:

    • Cinnamon
    • Vanilla Extract
    • Butter
    • Maple Syrup

    Equipment You’ll Need

    Fortunately, the equipment you need for this recipe is a staple in most kitchens, so you probably have these items already. And if you don’t have them, they are very inexpensive to buy. You only need these five things:

    • Waffle Iron
    • Whisk – A stainless steel balloon whisk is best, especially in a large size.
    • Two Big Mixing Bowls
    • Measuring Cups & Spoons
    • A Large Pan

    How to Make Vegan Fried Chicken

    1. Rinse off your king oyster mushrooms with water.
    2. Split each mushroom in half, then set them aside.
    3. Pour the plant-based milk into a bowl.
    4. Squeeze half a lemon into the bowl with the plant-based milk, then set aside.
    5. Pour flour into a bowl. Then, add seasonings and stir to combine.
    6. Dip mushrooms in the buttermilk (should be curdled), then dip them in the dry batter.
    7. Continue repeating the last step until the mushrooms are as battered as you want them to be.
    8. Heat oil in a large pan. Once it is hot, place the battered mushrooms in the oil.
    9. Fry until golden brown.

    How to Make Vegan Waffles

    1. Preheat your waffle iron
    2. Pour the waffle mix and cinnamon into a large mixing bowl, then whisk them together.
    3. Add vanilla extract, then whisk until well combined.
    4. Pour waffle batter into the heated waffle iron and cook.

    Video of Recipe

    Frequently Asked Questions

    Can I prepare the Vegan Chicken and Waffles ahead of time?

    Absolutely! While the waffles are best enjoyed fresh, you can prepare the vegan “chicken” in advance and store it in the fridge. Reheat it when you’re ready to assemble your delicious breakfast.

    Can I freeze the Vegan Chicken for future use?

    Certainly! The vegan “chicken” freezes well. Store it in airtight containers, and you’ll have a convenient option for a quick and satisfying breakfast on busy days.

    What toppings pair well with Vegan Chicken and Waffles?

    Get creative! Maple syrup and butter are classic choices, but you can also try savory toppings like vegan gravy, hot sauce, or a drizzle of tahini for an extra flavor kick.

    Are there any gluten-free options for this recipe?

    Absolutely. You can use a gluten-free flour mix for the waffles, and there are various gluten-free flour options for the coating on the vegan “chicken.” Just make sure to check labels for gluten-free and vegan suitability.

    Can I use a store-bought vegan “chicken” alternative?

    Definitely! If you’re short on time, you can opt for store-bought vegan “chicken” alternatives. Just follow the cooking instructions on the package, and you’ll still end up with a delicious dish.

    How can I make this recipe more kid-friendly?

    Consider cutting the waffles and vegan “chicken” into bite-sized pieces for a fun and easy-to-eat meal. You can also provide a variety of dipping sauces for added excitement.

    Happy eating!

    Chicken and Waffles

    Crispy vegan "chicken" meets fluffy waffles in this delightful breakfast combo. Quick, flavorful, and totally satisfying!
    Prep Time 15 minutes
    Cook Time 30 minutes
    Total Time 45 minutes
    Servings: 4 People
    Course: Breakfast
    Cuisine: American

    Ingredients
      

    Fried Chicken aka Oyster Mushrooms
    • 1 lb King Oyster Mushrooms
    • 1/2 Lemon
    • 1 cup Flour
    • 1-2 cup Oil
    • 2 tsp Cajun Seasoning
    • 1 cup Plant-Based Milk
    • 2 tsp Salt
    • 1 tsp Garlic Powder
    • 1 tsp Onion Powder
    • 1 tsp Pepper
    • 2 tsp Paprika
    Waffles
    • 2 cup Waffle Mix
    • 1 cup Water
    • 1 tsp Cinnamon
    • 1 tsp Vanilla Extract
    • 1 tsp Oil
    • Butter For Serving
    • Maple Syrup For Serving

    Equipment

    • 1 Waffle Iron
    • 1 Whisk
    • 2 Big Mixing Bowls
    • Measuring Cups & Spoons
    • 1 Large Pan

    Method
     

    How to Make Vegan Fried Chicken
    1. Rinse off your king oyster mushrooms with water.
    2. Split each mushroom in half, then set them aside.
    3. Pour the plant-based milk into a bowl.
    4. Squeeze half a lemon into the bowl with the plant-based milk, then set aside.
    5. Pour flour into a bowl. Then, add seasonings and stir to combine.
    6. Dip mushrooms in the buttermilk (should be curdled), then dip them in the dry batter.
    7. Continue repeating the last step until the mushrooms are as battered as you want them to be.
    8. Heat up oil in a large pan. Once it is hot, place the battered mushrooms in the oil.
    9. Fry until golden brown.
    How to Make Vegan Waffles
    1. Preheat your waffle iron.
    2. Pour the waffle mix and cinnamon into a large mixing bowl, then whisk them together.
    3. Add vanilla extract, then whisk until well combined.
    4. Pour waffle batter into the heated waffle iron and cook.

    Notes

    You can add as much or as little seasoning as you’d like.
  • The Best Vegan Cream Cheese and Crackers Recipe

    The Best Vegan Cream Cheese and Crackers Recipe

    Savor the simplicity of Vegan Cream Cheese and Crackers – a snack that’s a symphony of creamy vegan cheese, crisp crackers, and fresh tomatoes, all seasoned to perfection. It’s a delightful reminder that the tastiest treats are often the simplest.

    Disclaimer: As an Amazon affiliate, I earn from qualifying purchases made through links provided in this post. This comes at no additional cost to you, but it helps support my blog and allows me to continue creating content. Thank you for your support!

    Introduction

    When hunger strikes between meals, having a quick and satisfying snack on hand is essential. This Vegan Cream Cheese and Crackers recipe is the perfect way to quench your appetite. Whether you’re a plant-based beginner or simply looking for a tasty and healthy snack, this recipe is a winner.

    Why You’ll Love This Recipe

    • Quick & Easy – This recipe can be made in less than 5 minutes and is so simple to make.
    • Only 4 Ingredients – To make this recipe, you only need four ingredients. You won’t have to worry about gathering a long list of ingredients.
    • Flavorful – Even as effortless as this recipe is, it’s packed with lots of flavor! You can add any seasoning you’d like; as much or as little as you want.

    Ingredients You’ll Need

    Before we get started, let’s gather the ingredients:

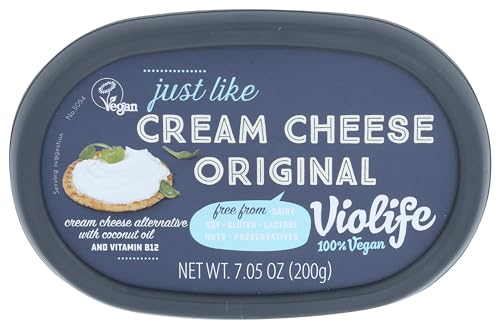
    • Vegan cream cheese – I’m using the one from Violife
    • Fresh, ripe tomatoes
    • Your favorite crackers – I’m using the rosemary & olive oil ones from Rustic Bakery.
    • Seasoning of your choice (salt, pepper, herbs, or spices)

    Instructions

    Step 1: Gather Your Ingredients

    First things first, make sure you have all your ingredients ready. Having everything within reach will make the preparation process smoother.

    Step 2: Preparing the Vegan Cream Cheese

    Start by taking your vegan cream cheese out of the refrigerator and allowing it to reach room temperature. This makes it easier to spread onto your crackers later.

    Step 3: Slicing the Fresh Tomatoes

    While your cream cheese is warming up, slice your fresh tomatoes into thin rounds. The juiciness and sweetness of ripe tomatoes will complement the creaminess of the vegan cheese.

    Step 4: Assembling the Crackers

    Now, take your favorite crackers and spread a generous layer of vegan cream cheese on each one. This will serve as the base for your delicious snack.

    Step 5: Seasoning Your Snack

    Sprinkle your chosen seasoning over the cream cheese-covered crackers. This step adds a burst of flavor to your snack. Feel free to get creative with your seasonings – some popular options include cracked black pepper, sea salt, dried herbs, or even a pinch of chili flakes for a hint of spice.

    Step 6: Serving Suggestions

    To assemble your vegan cream cheese and crackers, simply top each cracker with a tomato slice. The combination of the creamy cheese, crispy cracker, and fresh tomato creates a tantalizing flavor and texture contrast.

    Benefits of Vegan Cream Cheese & Crackers

    • This snack is dairy-free and perfect for vegans or those with lactose intolerance.
    • Tomatoes are rich in vitamins and antioxidants, promoting overall health.
    • Seasonings can be customized to suit your taste preferences.
    • It’s a quick and satisfying snack for any time of day.

    Tips for Making the Perfect Snack

    • Choose high-quality vegan cream cheese for the best taste and texture.
    • Opt for ripe and juicy tomatoes to enhance the flavor.
    • Experiment with different seasonings to keep things exciting.

    Frequently Asked Questions

    Can I use gluten-free crackers for this recipe?

    Absolutely! You can easily adapt this recipe to be gluten-free by choosing gluten-free crackers.

    What are some creative seasoning ideas for this snack?

    Try balsamic glaze, garlic powder, or nutritional yeast for unique flavor profiles.

    Can I prepare this snack in advance for a party or gathering?

    Yes, you can pre-assemble the crackers and store them in an airtight container in the refrigerator until you’re ready to serve.

    Is vegan cream cheese readily available in stores?

    Yes, most grocery stores now offer a variety of vegan cream cheese brands in their dairy-free section. My favorite is Violife’s Just Like Cream Cheese Original. It’s delicious and multipurpose, so you can use it in a savory or sweet recipe.

    Can I add other toppings besides tomatoes?

    Absolutely! You can experiment with toppings like avocado, cucumber, roasted red pepper, or anything you want.

    Conclusion

    In conclusion, this vegan cream cheese and crackers recipe offers a delightful and nutritious snack option that’s easy to prepare and bursting with flavor. Whether you’re a vegan or simply looking for a healthier snack alternative, this recipe is a winner. So, give it a try and indulge in a tasty, guilt-free treat. Make sure to leave a comment below and give the recipe a rating!

    Happy Eating!

    With Love,

    Vegan Cream Cheese and Crackers

    Vegan Cream Cheese and Crackers

    Yield: 4 servings
    Prep Time: 5 minutes
    Total Time: 5 minutes

    Savor the simplicity of Vegan Cream Cheese and Crackers – a snack that's a symphony of creamy vegan cheese, crisp crackers, and fresh tomatoes, all seasoned to perfection. It's a delightful reminder that the tastiest treats are often the simplest.

    No Ratings

    Ingredients

    • Vegan cream cheese
    • Crackers
    • Tomatoes
    • Seasoning

    Instructions

    1. Gather Your Ingredients: Ensure you have all the ingredients ready for assembly.
    2. Prepare the Vegan Cream Cheese: Let the vegan cream cheese come to room temperature for easy spreading.
    3. Slice Fresh Tomatoes: Slice ripe tomatoes into small pieces.
    4. Assemble the Crackers: Spread a generous layer of vegan cream cheese on each cracker.
    5. Season Your Snack: Sprinkle your chosen seasoning over the cream cheese-covered crackers.
    6. Add Tomato Slices: Top each cracker with a fresh tomato slice.
    7. Serve and Enjoy: Your vegan cream cheese and crackers are ready to be savored!

    Recommended Products

    As an Amazon Associate and member of other affiliate programs, I earn from qualifying purchases.

    Nutrition Information:
    Yield: 4 Serving Size: 1
    Amount Per Serving: Calories: 33Total Fat: 3gSaturated Fat: 1gTrans Fat: 0gUnsaturated Fat: 1gCholesterol: 0mgSodium: 110mgCarbohydrates: 2gFiber: 0gSugar: 1gProtein: 1g

    Did you make this recipe?

    Please leave a comment on the blog or share a photo on Instagram!

  • How to Make Dairy-Free Vegan Nachos

    How to Make Dairy-Free Vegan Nachos

    Disclaimer: As an Amazon affiliate, I earn from qualifying purchases made through links provided in this post. This comes at no additional cost to you, but it helps support my blog and allows me to continue creating content. Thank you for your support!

    Introduction

    Nachos have always been a favorite snack for many, perfect for movie nights, parties, or just a delightful evening treat. However, for those who can’t eat cheese, the traditional recipe can be a no-go. But don’t fret! There’s a way to enjoy this treat without the dairy, and I’m here to share the magic with you.

    Why Go Dairy-Free?

    For many, the choice to go dairy-free isn’t just a dietary preference but a necessity. For individuals who are lactose intolerant, dairy can lead to uncomfortable symptoms. Personally, I can’t have dairy because it causes digestive and skin issues for me. It’s actually one of the reasons I became plant-based. Beyond that, some choose a dairy-free diet due to ethical reasons, health reasons, or a desire to lead a vegan lifestyle. Whatever your reason, there’s no need to miss out on the joys of nachos.

    Benefits of a Dairy-Free Diet

    • Digestive Comfort: Reduces symptoms for those lactose intolerant.
    • Eco-friendly: Dairy farms can have environmental implications.
    • Animal-friendly: Vegan choices lead to reduced animal harm.
    • Health Perks: Some studies suggest reduced dairy can lead to clearer skin and reduced risk of certain health issues.

    How to Make Cashew Cream aka Your Nacho Cheese

    Cashews, with their inherent creamy texture when blended, make for an excellent cheese substitute. Rich in healthy fats and minerals, they’re a nutritious and tasty option for our nacho creation.

    • Ingredients:
      • 1 cup of raw cashews (soaked for 4 hours or boiled for 15-30 minutes)
      • Garlic powder
      • 1/4 cup nutritional yeast
      • Juice of one lemon
    • Procedure:
      1. Drain and rinse the soaked cashews or boil cashews for 15-30 minutes.
      2. Blend all ingredients in a high-speed blender until smooth, adjusting water as needed.
      3. Taste and adjust seasoning. Use immediately or store in the fridge for up to a week.

    Assembling Your Dairy-Free Vegan Nachos

    brooklyninthehaus holding dairy free vegan nachos on white plate

    With your cashew cream ready, it’s time to put your nachos together!

    1. Chips: Lay out your favorite tortilla chips on a tray or plate.
    2. Drizzle with Cashew Cream: Generously or sparingly, as you like!
    3. Toppings: Add beans, guacamole, jalapenos, olives, or any of your preferred toppings.
    4. Bake or Serve Fresh: Some prefer their nachos hot and crispy from the oven, while others love them fresh. The choice is yours!

    Pairing with Perfect Dips

    A good nacho dish isn’t complete without dips. Consider these:

    1. Salsa: A tangy and spicy option.
    2. Guacamole: Creamy goodness from avocados.
    3. Vegan Sour Cream: Can be made using tofu or cashews.

    Serving Suggestions and Variations

    The best thing about nachos? They’re highly customizable!

    1. For Meat Lovers: Add vegan meat crumbles.
    2. Tex-Mex Style: Incorporate vegan chili.
    3. Extra Veggie: Top with roasted veggies for a nutritious punch.

    Storing and Reheating Tips

    1. Avoid Sogginess: Store chips and toppings separately.
    2. Reheat in Oven: Brings back the crispiness better than a microwave.

    FAQs (Frequently Asked Questions)

    What if I’m allergic to cashews?

    There are many other nut-based or seed-based cheeses available, like almond or sunflower seed cheese. You can also just use store-bought vegan cheeses like. Always pick what’s safe for you.

    Do I have to soak the cashews?

    Soaking cashews softens them, making blending easier and the cream smoother. If you’re short on time, a hot water quick-soak for 20 minutes can work too.

    Can I freeze the cashew cream?

    Absolutely! It can be frozen for up to two months. Just thaw in the fridge overnight before using.

    Are there other vegan cheese options?

    Yes! From store-bought vegan cheeses to homemade almond or tofu-based cheeses, there’s a wide variety to explore.

    How long do the nachos last?

    If stored properly, they can last up to 3 days in the fridge. However, for optimal freshness and crunch, it’s best enjoyed immediately.

    Is this recipe gluten-free?

    Yes, as long as you ensure the tortilla chips and other ingredients used are gluten-free.

    Conclusion

    Being dairy-free does not mean that you have to eliminate nachos all together. It just means that you have to make it differently. With this guide on How to Make Dairy-Free Vegan Nachos, you have a simple and tasty way to enjoy a classic favorite. Whether it’s for ethical reasons, health choices, or simply curiosity, everyone can enjoy the rich flavors and textures this dish offers. So, gather your ingredients, get cooking, and dive into a plate of nacho goodness!

    Happy Eating!

    With Love,

    vegan dairy free nachos on white plate

    Vegan Dairy-Free Nachos

    Prep Time: 20 minutes
    Cook Time: 10 minutes
    Total Time: 30 minutes
    5.0 Stars (1 Review)

    Ingredients

    • Tortilla Chips

    Cashew Cream

    • Raw Cashews
    • Garlic Powder
    • Nutritional Yeast
    • Lemon
    • Seasonings
    • Water

    Toppings

    • Avocado
    • Tomatoes
    • Black Beans
    • Anything else you like

    Instructions

    1. If using the soaking method, soak cashews in water overnight. Alternatively, boil them for 15-30 minutes.
    2. Drain and rinse the soaked or boiled cashews.
    3. Blend cashews, garlic, nutritional yeast, lemon juice, and salt in a high-speed blender until smooth. Adjust the water to the desired consistency. It should create a cream that is easy to start
    4. Taste and adjust seasoning if needed.
    5. Lay tortilla chips on a tray.
    6. Add beans, guacamole, jalapenos, olives, and any additional preferred toppings.
    7. Drizzle generously with the prepared cashew cream.
    8. You can serve fresh or bake in a preheated oven at 375°F (190°C) for 10 minutes or until chips are crispy and toppings are heated.
    9. Serve immediately with optional dips like salsa or additional guacamole.

    Notes

    • Vegan meat crumbles or roasted veggies can be added for a richer flavor.
    • Store-bought vegan cheese can also be used as an additional or alternative topping.
    • Cashew cream can be stored in the fridge for up to a week.

    Recommended Products

    As an Amazon Associate and member of other affiliate programs, I earn from qualifying purchases.

    Nutrition Information:
    Yield: 4 Serving Size: 1
    Amount Per Serving: Calories: 208Total Fat: 11gSaturated Fat: 2gTrans Fat: 0gUnsaturated Fat: 9gCholesterol: 0mgSodium: 15mgCarbohydrates: 22gFiber: 9gSugar: 2gProtein: 9g

    The nutritional information provided for this recipe is an estimate and should be used for informational purposes only. Factors like ingredient substitutions, portion sizes, and preparation methods can alter the nutritional values. For precise nutritional data, it is recommended to consult a registered dietitian or use a trusted nutrition calculator based on the exact ingredients you used.

    Did you make this recipe?

    Please leave a comment on the blog or share a photo on Instagram!

  • Vegan Baking Made Easy: A Step-by-Step Guide

    Vegan Baking Made Easy: A Step-by-Step Guide

    Introduction

    Are you new to vegan or plant-based baking and not sure where to begin? Embarking on the journey of vegan baking can be both exciting and challenging, especially if you can’t have dairy like me. But worry not! This article is here to guide you through the wonderful world of vegan baking. Whether you’re an experienced vegan or curious about plant-based options in baking, get ready to discover tips, tricks, and mouthwatering recipes that satisfy your cravings and impress your taste buds. So, let’s dive in and explore the joys of creating delectable vegan treats!

    Why Choose Vegan Baking?

    If you’re wondering why you should give vegan baking a try, let me fill you in on the benefits. Vegan baking not only allows you to create delicious treats but also promotes a healthier lifestyle and reduces your impact on the environment. By omitting animal products such as eggs, dairy, and honey, you’ll be baking goodies that are lower in cholesterol, saturated fats, and calories. Additionally, vegan baking aligns with ethical values by supporting animal welfare and reducing carbon footprint. It’s a win-win for your health and the planet!

    Essential Ingredients for Vegan Baking

    When it comes to vegan baking, the first step is gathering the essential ingredients that form the foundation of your recipes. These ingredients are absolute staples for any vegan or plant-based baking.

    1. Flaxseeds: Nature’s Egg Replacer

    When it comes to replacing eggs in vegan baking, flaxseeds are your new best friend. By mixing one tablespoon of ground flaxseeds with three tablespoons of water, you create a gel-like mixture that mimics the binding properties of eggs. This magical flaxseed gel can be used in recipes like muffins, cookies, and cakes to give your baked goods the structure they need.

    2. Nut Milk: Creaminess without Dairy

    Say goodbye to dairy milk and hello to nut milk! Almond, cashew, and oat milk are excellent alternatives to cow’s milk in vegan baking. They provide the creaminess and moisture required for your recipes. Just make sure to choose unsweetened varieties to have control over the sweetness of your creations.

    3. Coconut Oil: A Versatile Vegan Fat

    Coconut oil is a superstar in the vegan baking world. Its solid texture at room temperature makes it an ideal substitute for butter. Whether you’re making cookies or pie crusts, coconut oil adds a delicious flavor and richness to your treats. If you prefer a neutral taste, go for refined coconut oil.

    4. Agave Nectar: A Natural Sweetener

    To sweeten your vegan creations, agave nectar is a fantastic option. Derived from the agave plant, this natural sweetener provides the perfect level of sweetness without the need for honey. It blends well with other ingredients and dissolves easily, making it an excellent choice for your vegan desserts.

    5. Whole Wheat Flour: Nutritious and Wholesome

    When it comes to flour, opt for whole wheat flour in your vegan baking adventures. Unlike refined white flour, whole wheat flour retains its natural fiber and nutrients, adding a nutritional boost to your treats. It lends a slightly nutty flavor and a denser texture, making it perfect for bread and muffins.

    Tips for Successful Vegan Baking

    Now that you’re equipped with the essential ingredients, let’s dive into some tips and tricks to ensure your vegan baking endeavors are a sweet success:

    1. Accurate Measurements Are Key

    Precision is crucial in baking, and vegan baking is no exception. Invest in a good set of measuring cups and spoons to ensure accurate measurements. Spoon flour into the measuring cup and level it off for precise amounts. This attention to detail will help you achieve consistent and delicious results.

    2. Don’t Overmix the Batter

    When mixing your vegan batter, remember not to overdo it. Overmixing can result in dense and tough baked goods. Mix the ingredients until they are just combined, and don’t worry if you see a few lumps here and there. Embrace a gentle approach, and you’ll be rewarded with light and fluffy treats.

    3. Get Creative with Flavors

    Vegan baking offers endless opportunities to play with flavors. Don’t hesitate to experiment with spices like cinnamon, nutmeg, and cardamom to add warmth and depth to your desserts. Enhance the taste by incorporating citrus zest or using extracts like vanilla, almond, or coconut. Let your taste buds be your guide, and don’t be afraid to get creative!

    4. Add Texture with Nuts and Seeds

    Nuts and seeds are fantastic additions to vegan baking, providing texture, crunch, and a dose of healthy fats. Chopped walnuts, slivered almonds, or pumpkin seeds can take your treats to the next level. Sprinkle them on top of muffins, bread, or cakes before baking for that irresistible finishing touch.

    5. Allow Proper Cooling Time

    Patience is a virtue in baking, and proper cooling time is essential. Once you remove your vegan goodies from the oven, allow them to cool completely before diving in. This cooling period allows the flavors to develop and the texture to set. Exercise some self-control, and your patience will be rewarded with perfectly baked treats.

    Delicious Vegan Baking Recipes

    It’s time to put your newfound knowledge and skills into action with some delightful vegan recipes. Here are a few mouthwatering options to get you started:

    Recipe 1: Vegan Chocolate Chip Cookies

    Ingredients:

    • 1 ½ cups all-purpose flour
    • ½ teaspoon baking soda
    • ½ teaspoon salt
    • ½ cup coconut oil
    • ½ cup brown sugar
    • ¼ cup granulated sugar
    • ¼ cup almond milk
    • 1 teaspoon vanilla extract
    • 1 cup vegan chocolate chips

    Instructions:

    • Preheat the oven to 350°F (175°C) and line a baking sheet with parchment paper.
    • In a bowl, whisk together the flour, baking soda, and salt.
    • In a separate bowl, cream together the coconut oil, brown sugar, and granulated sugar until smooth.
    • Add the almond milk and vanilla extract to the wet mixture and mix well.
    • Gradually incorporate the dry ingredients into the wet mixture until a dough forms.
    • Fold in the vegan chocolate chips.
    • Scoop tablespoon-sized portions of dough onto the prepared baking sheet, spacing them about 2 inches apart.
    • Bake for 10-12 minutes or until the edges are golden brown.
    • Remove from the oven and let the cookies cool on the baking sheet for 5 minutes before transferring them to a wire rack to cool completely.
    • Enjoy these irresistible vegan chocolate chip cookies!

    Recipe 2: Fluffy Vegan Pancakes

    Ingredients:

    • 1 ¼ cups all-purpose flour
    • 2 tablespoons sugar
    • 2 teaspoons baking powder
    • ½ teaspoon salt
    • 1 cup almond milk
    • 1 tablespoon apple cider vinegar
    • 1 tablespoon coconut oil, melted
    • 1 teaspoon vanilla extract

    Instructions:

    • In a large bowl, whisk together the flour, sugar, baking powder, and salt.
    • In a separate bowl, combine the almond milk and apple cider vinegar. Let it sit for a few minutes to curdle.
    • Add the melted coconut oil and vanilla extract to the almond milk mixture and stir well.
    • Pour the wet ingredients into the dry ingredients and mix until just combined. Be careful not to overmix; a few lumps are perfectly fine.
    • Heat a non-stick skillet or griddle over medium heat.
    • Pour ¼ cup of batter onto the heated surface for each pancake.
    • Cook until bubbles form on the surface, then flip and cook for another minute or until golden brown.
    • Serve these fluffy vegan pancakes with your favorite toppings, such as maple syrup, fresh berries, or dairy-free yogurt.

    Recipe 3: Vegan Cinnamon Rolls

    Ingredients: For the dough:

    • 2 ¾ cups all-purpose flour
    • 2 tablespoons sugar
    • 2 ¼ teaspoons instant yeast
    • ½ teaspoon salt
    • ½ cup almond milk
    • ¼ cup water
    • 2 tablespoons coconut oil, melted

    For the filling:

    • ½ cup brown sugar
    • 2 tablespoons ground cinnamon
    • 2 tablespoons coconut oil, softened

    For the icing:

    • 1 cup powdered sugar
    • 2 tablespoons almond milk
    • ½ teaspoon vanilla extract

    Instructions:

    • In a large bowl, whisk together the flour, sugar, instant yeast, and salt.
    • In a small saucepan, heat the almond milk, water, and melted coconut oil until warm but not boiling.
    • Pour the liquid mixture into the dry ingredients and stir until a soft dough forms.
    • Transfer the dough to a floured surface and knead for about 5 minutes or until smooth and elastic.
    • Place the dough in a greased bowl, cover with a clean kitchen towel, and let it rise in a warm place for about 1 hour or until doubled in size.
    • Punch down the dough and roll it out into a large rectangle.
    • Spread the softened coconut oil evenly over the dough.
    • In a small bowl, mix together the brown sugar and ground cinnamon. Sprinkle the mixture over the coconut oil.
    • Starting from one long side, tightly roll up the dough into a log.
    • Cut the log into 12 equal-sized rolls.
    • Place the rolls in a greased baking dish, cover, and let them rise for another 30 minutes.
    • Preheat the oven to 375°F (190°C).
    • Bake the cinnamon rolls for 20-25 minutes or until golden brown.
    • In a bowl, whisk together the powdered sugar, almond milk, and vanilla extract to make the icing.
    • Drizzle the icing over the warm cinnamon rolls.
    • Indulge in these heavenly vegan cinnamon rolls and savor the flavors!

    FAQs (Frequently Asked Questions)

    Now, let’s address some common questions you may have about vegan baking:

    1. Is vegan baking difficult?

    Not at all! While there may be some adjustments and substitutions to consider, vegan baking can be just as easy and enjoyable as traditional baking. With practice and the right recipes, you’ll become a pro in no time!

    2. Can I use regular recipes and simply substitute vegan ingredients?

    In some cases, you can make ingredient swaps to veganize non-vegan recipes. However, it’s important to understand that vegan baking often requires specific ingredient combinations to achieve the desired texture and flavor. It’s best to follow vegan recipes or adapt non-vegan ones that are specifically designed for vegan baking.

    3. How can I make my vegan baked goods moist?

    Moisture is key in vegan baking. To keep your baked goods moist, you can incorporate ingredients like nut milk, applesauce, mashed bananas, or vegetable purees. These additions provide moisture and contribute to the overall texture of your treats.

    4. Are vegan baked goods healthier than traditional ones?

    Vegan baked goods can be healthier than traditional ones in many ways. They are often lower in cholesterol, saturated fats, and calories. Additionally, vegan baking promotes the use of wholesome ingredients like whole grains and natural sweeteners. However, it’s still important to enjoy vegan treats in moderation as part of a balanced diet.

    5. Can I freeze vegan baked goods?

    Absolutely! Just like traditional baked goods, you can freeze vegan treats for later enjoyment. Ensure they are fully cooled, then wrap them tightly in plastic wrap or place them in airtight containers before freezing. They can be stored in the freezer for up to three months. Thaw them at room temperature or reheat in the oven when you’re ready to indulge.

    6. Where can I find more vegan baking recipes?

    There’s a wealth of vegan baking recipes available online, in vegan cookbooks, and on food blogs dedicated to plant-based recipes. Explore these resources, join vegan baking communities, and let your culinary creativity soar!

    Conclusion

    Congratulations! You’re now equipped with valuable tips, tricks, and delicious vegan recipes to embark on your vegan baking journey. Embrace the world of vegan baking with confidence and creativity. From chocolate chip cookies to fluffy pancakes and heavenly cinnamon rolls, the possibilities are endless. So, get into the kitchen, gather your ingredients, and let the joy of vegan baking fill your home with delightful aromas and mouthwatering treats!

    Happy Eating!

    With Love,

  • 10 Fast 10-Minute Workouts For People on the Go

    10 Fast 10-Minute Workouts For People on the Go

    woman doing jump rope in front of building

    As a busy person, I understand how difficult it can be to find time to exercise. There always seems to be something else that needs to be done, and the thought of spending an hour or more at the gym can be daunting. That’s where 10-minute workouts come in. They’re quick, efficient, and can be done anywhere, anytime. In this post, I’ll share ten different 10-minute workouts that you can do on the go, without any equipment. So no matter how busy your day is, you can still find time to stay active and take care of your health.

    10-minute HIIT workout

    High-intensity interval training, or HIIT, is a great way to get an effective workout in a short amount of time. Warm up with 30 seconds of jumping jacks, then do 3 rounds of the following:

    • 30 seconds of high knees
    • 30 seconds of jump lunges
    • 30 seconds of mountain climbers
    • 30 seconds of burpees
    • Take a 30-second rest between rounds.

    10-minute core workout

    This core workout will get your abs burning in just 10 minutes. Do 2 rounds of the following:

    • 30 seconds of bicycle crunches
    • 30 seconds of leg raises
    • 30 seconds of Russian twists
    • 30 seconds of plank jacks
    • Take a 15-second rest between exercises.

    10-minute full-body workout

    woman in plank position on pink mat

    This workout targets your entire body and requires no equipment. Do 2 rounds of the following:

    • 30 seconds of jump squats
    • 30 seconds of push-ups
    • 30 seconds of reverse lunges
    • 30 seconds of plank shoulder taps
    • Take a 15-second rest between exercises.

    10-minute cardio workout

    Get your heart rate up with this quick cardio workout. Do three rounds of the following:

    • 30 seconds of jumping jacks
    • 30 seconds of high knees
    • 30 seconds of butt kicks
    • 30 seconds of skaters
    • Take a 30-second rest between rounds.

    10-minute bodyweight workout

    You don’t need any exercise equipment for this quick bodyweight workout, so it’s a good option if you want to exercise at home or at the park, or if you’re traveling and staying in a hotel without a gym. Warm up with 60 seconds of jumping jacks. Complete 2 rounds of the following:

    • 45 seconds of jump squats
    • 45 seconds of push-ups with shoulder taps
    • 45 seconds of crossover mountain climbers
    • 45 seconds of burpees
    • 45 seconds of up-down plank

    10-minute abs workout

    woman doing crunches on mat on wooden floor

    This quick abs workout is perfect for targeting your core. Do 2 rounds of the following:

    • 30 seconds of reverse crunches
    • 30 seconds of bicycle crunches
    • 30 seconds of leg raises
    • 30 seconds of Russian twists
    • Take a 15-second rest between exercises.

    10-minute standing ab workout

    This ab workout can be done standing up, making it a great option for when you don’t want to get on the floor. Do 2 rounds of the following:

    • 30 seconds of standing oblique crunches (each side)
    • 30 seconds of standing knee to elbow twists (each side)
    • 30 seconds of standing leg raises (each side)
    • Take a 15-second rest between exercises.

    10-minute arm workout

    Give your arms a quick and effective workout in just 10 minutes. Complete 2 rounds of the following exercises, with a 15-second rest between each exercise:

    • 30 seconds of push-ups
    • 30 seconds of bicep curls (use dumbbells or any available weight)
    • 30 seconds of tricep dips (use a sturdy chair or bench)
    • 30 seconds of arm circles (15 seconds clockwise, 15 seconds counterclockwise)
    • Remember to maintain proper form and control throughout each exercise.

    Feel free to adjust the intensity and weight according to your fitness level. This routine is perfect for busy schedules and can help you maintain strong and toned arms.

    10-minute yoga flow

    woman in chair yoga pose

    This 10-minute yoga flow is perfect for beginners or anyone looking to get in a quick stretch. It’s also a great way to start or end your day.

    • Begin in mountain pose and take three deep breaths.
    • Move into a forward fold and hold for three breaths.
    • Move into downward dog and hold for three breaths.
    • Move into warrior I on each side and hold for three breaths.
    • Move into triangle pose on each side and hold for three breaths.
    • Finish with child’s pose for three breaths.

    10-minute jump rope workout

    Jumping rope is a great cardiovascular workout that can be done anywhere. If you don’t have a jump rope, pretend you do or just jump in place.

    • Jump for 30 seconds, rest for 10 seconds.
    • Jump for 30 seconds, rest for 10 seconds.
    • Jump with high knees for 30 seconds, rest for 10 seconds.
    • Jump with butt kicks for 30 seconds, rest for 10 seconds.
    • Jump side to side for 30 seconds, rest for 10 seconds.
    • Jump for 30 seconds, rest for 10 seconds.

    Bonus: 10-minute stretching routine

    woman stretching on pink mat

    Stretching is an essential part of any workout routine, but it’s also important for reducing stress and preventing injury. This quick stretching routine can be done anywhere and is perfect for a cool-down after a workout or as a standalone routine to improve your flexibility.

    • Start with a simple standing hamstring stretch. Stand with your feet hip-width apart, take a deep breath in, and as you exhale, hinge at your hips and fold forward, reaching your fingertips towards your toes. Hold the stretch for 30 seconds.
    • Move on to a quadriceps stretch. Stand on one leg and bring your heel towards your buttocks. Grab your ankle with one hand and hold the stretch for 15 seconds. Switch sides and repeat.
    • Next, perform a standing calf stretch. Stand facing a wall and place your hands on the wall at shoulder height. Step one foot back, keeping your heel on the ground, and lean forward into the wall. Hold the stretch for 30 seconds and switch sides.
    • Finally, finish with a seated spinal twist. Sit on the ground with your legs extended in front of you. Bend your right knee and place your foot on the ground outside of your left thigh. Bring your left elbow to the outside of your right knee and twist to the right. Hold the stretch for 30 seconds and switch sides.

    Remember, the key to staying consistent with your fitness routine is finding workouts that work for you and your lifestyle. With these 10 quick and easy 10-minute workouts, you can stay active no matter how busy you are or where you are. So, take a few minutes out of your day and try one of these workouts. You might be surprised at how much you can accomplish in just 10 minutes! Keep moving, stay motivated, and don’t forget to have fun!

    With Love,

  • Want to know the difference between vegan, vegetarian, & plant-based diets? Here’s a simple guide.

    Want to know the difference between vegan, vegetarian, & plant-based diets? Here’s a simple guide.

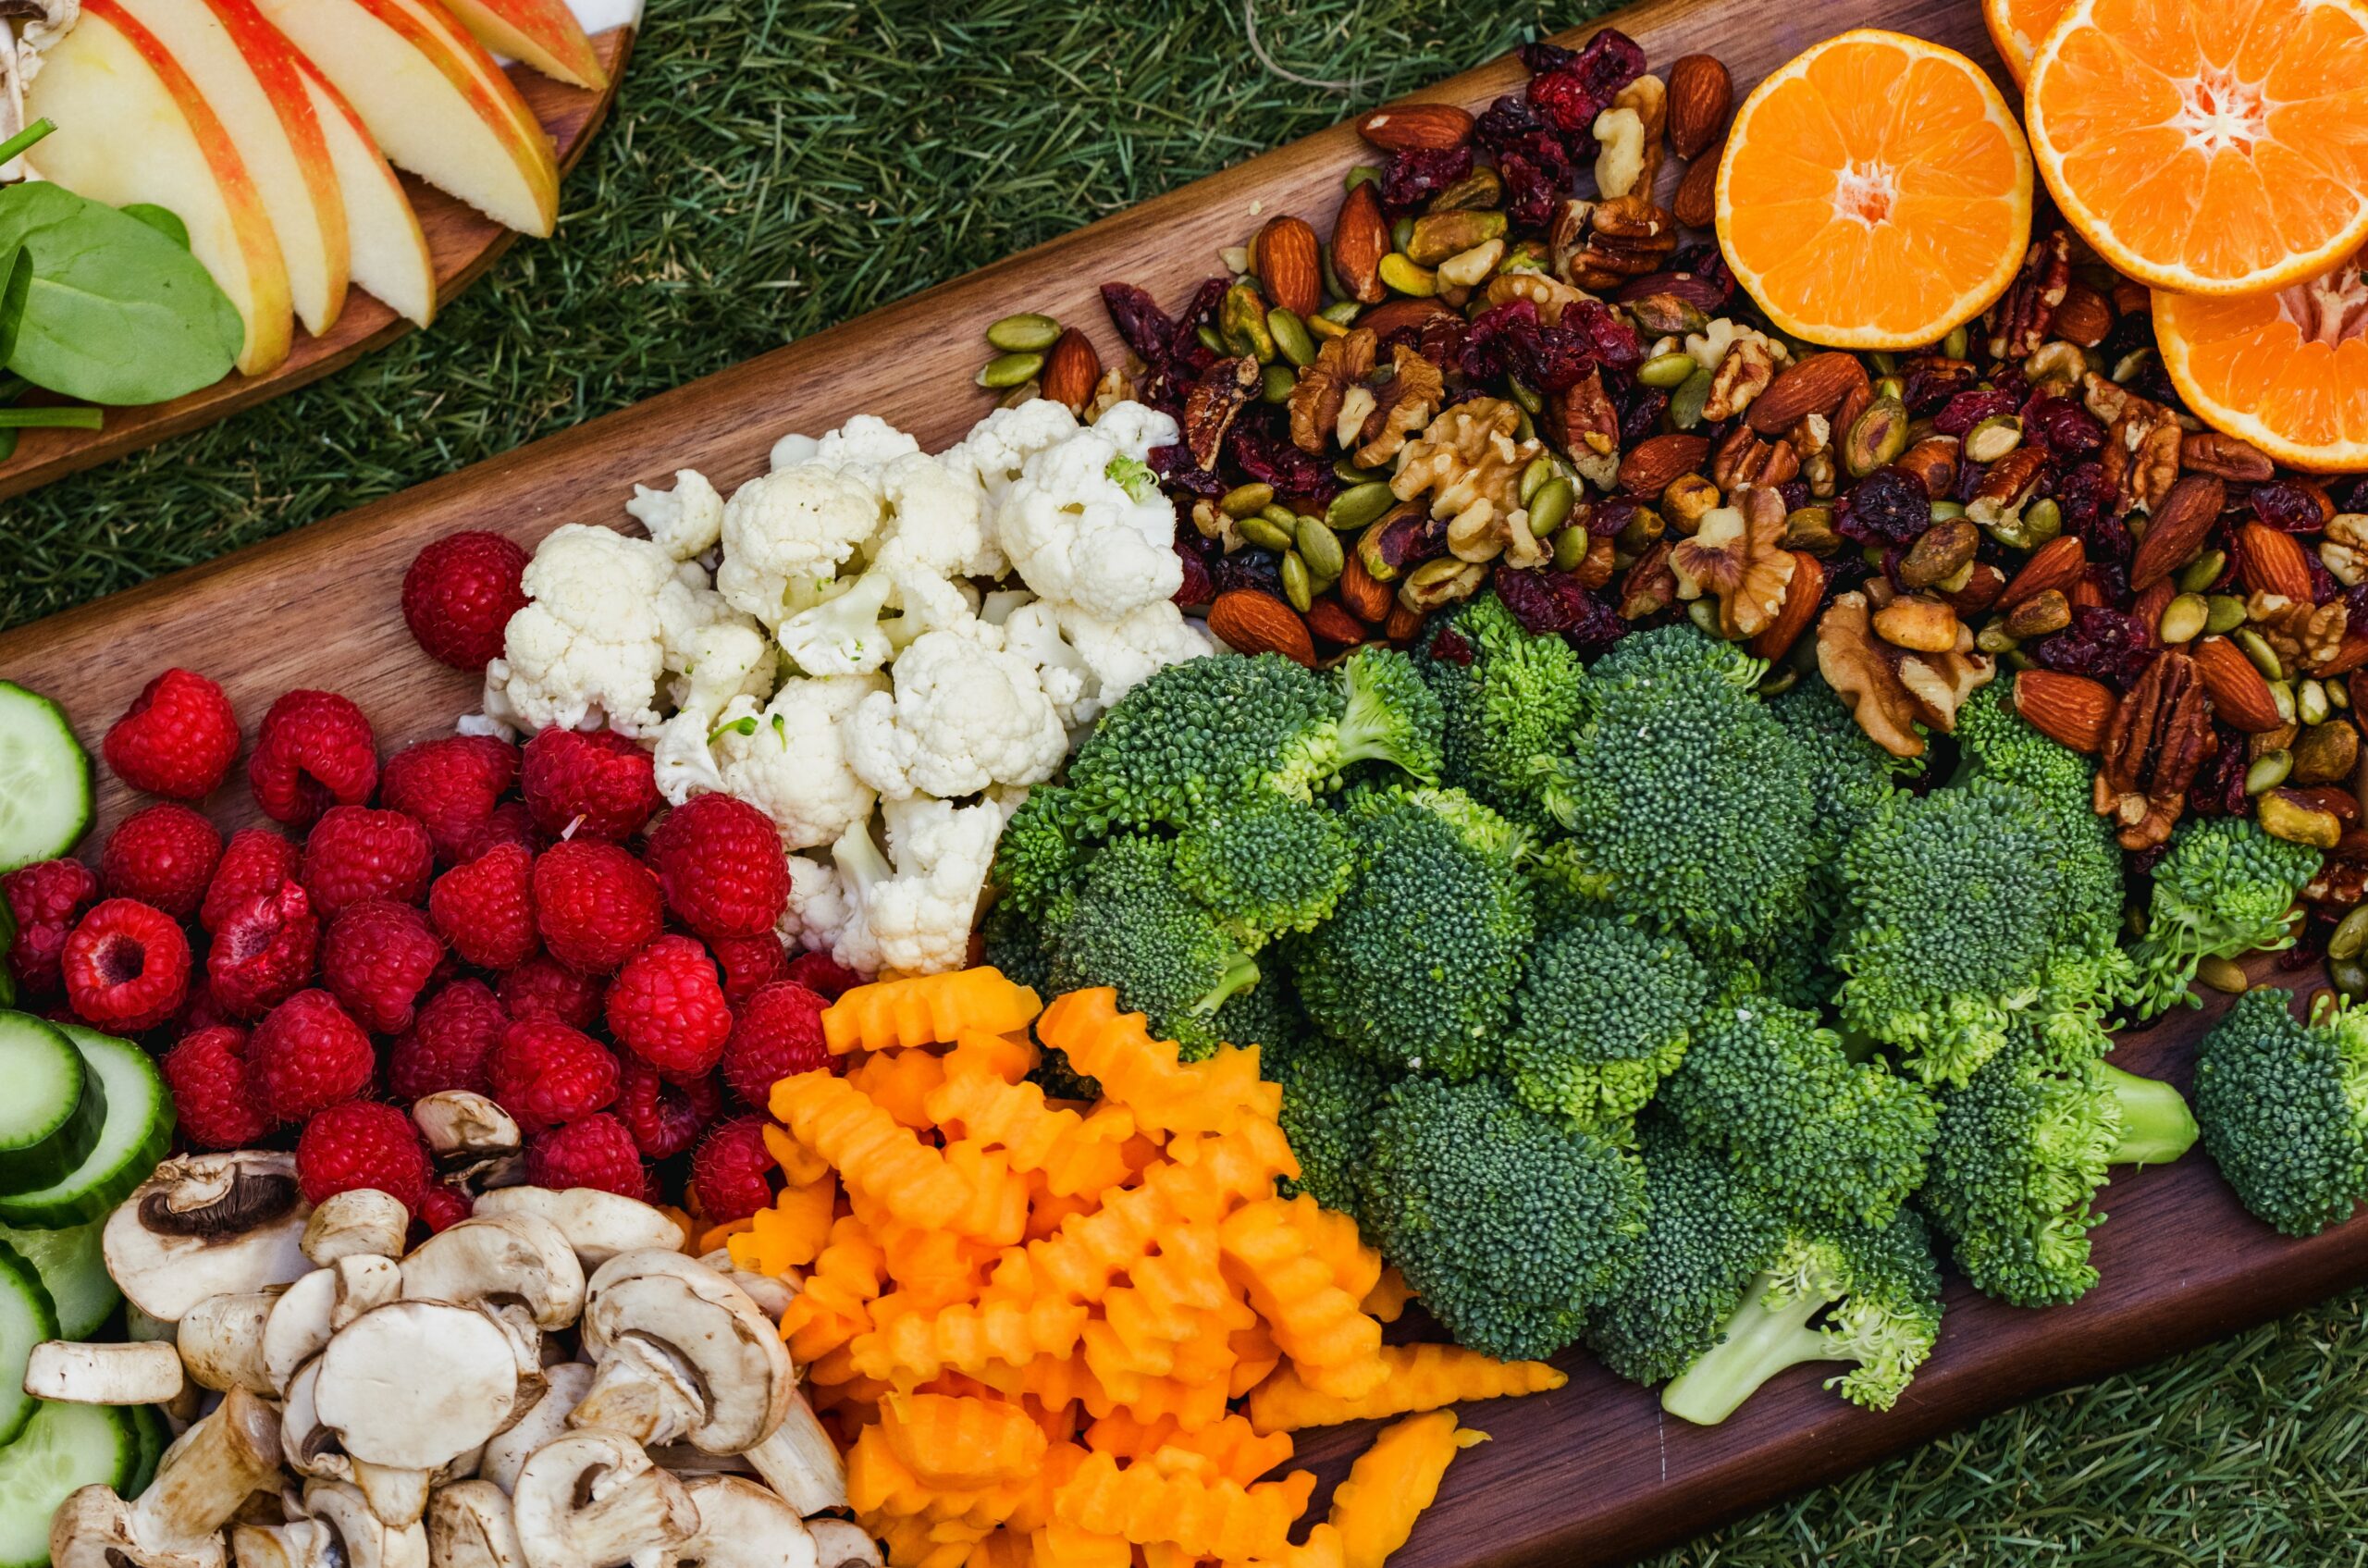
    Board with vegetables, fruits, and nuts, cauliflower, carrots, broccoli,

    With terms like vegan, vegetarian, and plant-based, it can be tough to know where to start. But don’t worry, I’m here to help! This guide will give you a clear understanding of each type of diet so you can choose the one that’s perfect for you.

    Veganism

    Veganism is not just a dietary choice, it’s a lifestyle. It seeks to exclude the use of animals for food, clothing, or any other purpose. This means vegans avoid meat, dairy products, eggs, honey, and any other animal-derived ingredients. They also tend to avoid products that are tested on animals, leather goods, and products made from silk, wool, or any other animal-derived materials.

    For vegans, the avoidance of animal products is a moral, ethical, and environmental choice. They believe that all living beings have the right to be free from harm, exploitation, and suffering. As such, they choose not to participate in any practices that exploit animals, including the consumption of animal products.

    What Do Vegans Eat?

    A vegan diet consists of whole foods such as fruits, vegetables, grains, legumes, nuts, and seeds. Veganism excludes all animal products, including meat, poultry, fish, dairy, eggs, and honey. As limiting as that may sound, there are is a massive variety of plant-based alternatives to choose from. Some alternatives include almond milk (my favorite!), oat milk, tofu, nutritional yeast, and so much more!

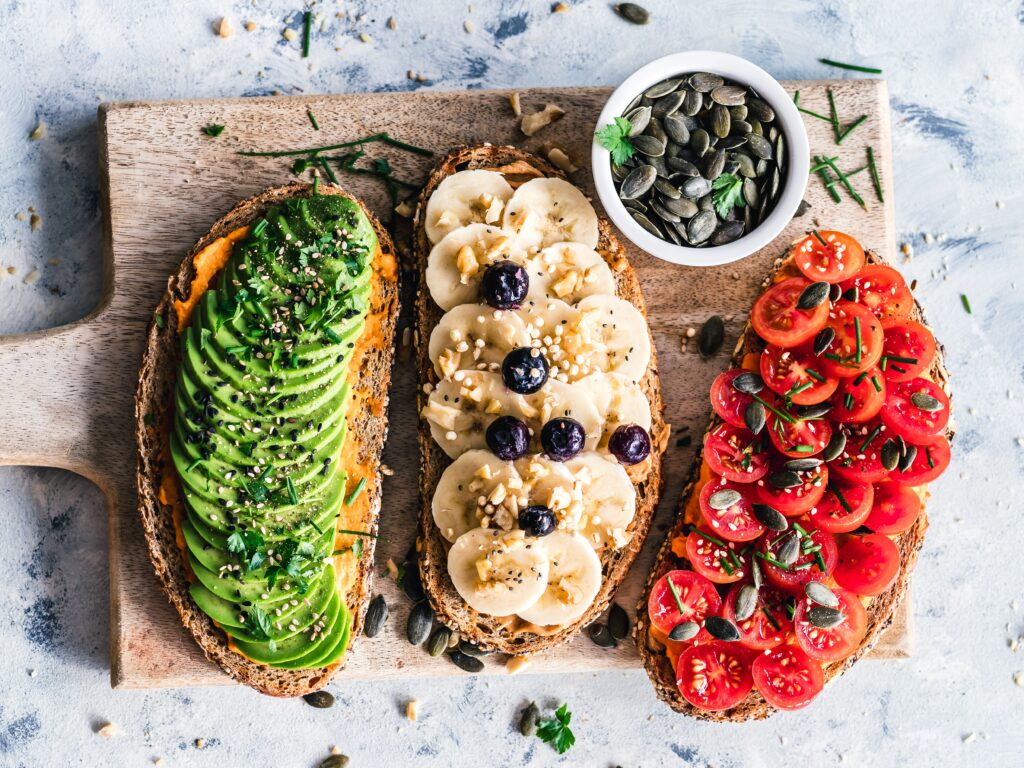
    This is the perfect example of a tasty vegan breakfast.

    Vegetarianism

    Vegetarianism shares the same core values as veganism, but it’s not as strict. Similar to vegans, their diet contains a variety of plant-based foods. Vegetarians avoid eating meat, poultry, and fish, but they may consume dairy products, eggs, and honey. They can also use plant-based substitutes like tempeh and veggie patties.

    There are different types of vegetarianism, including:

    • Lacto-ovo-vegetarianism: This is the most common type of vegetarianism. Lacto-ovo vegetarians consume dairy products and eggs, but avoid meat, poultry, and fish.
    • Lacto-vegetarianism: This type of vegetarianism allows for dairy products but excludes eggs.
    • Ovo-vegetarianism: This type of vegetarianism allows for eggs but excludes dairy products.
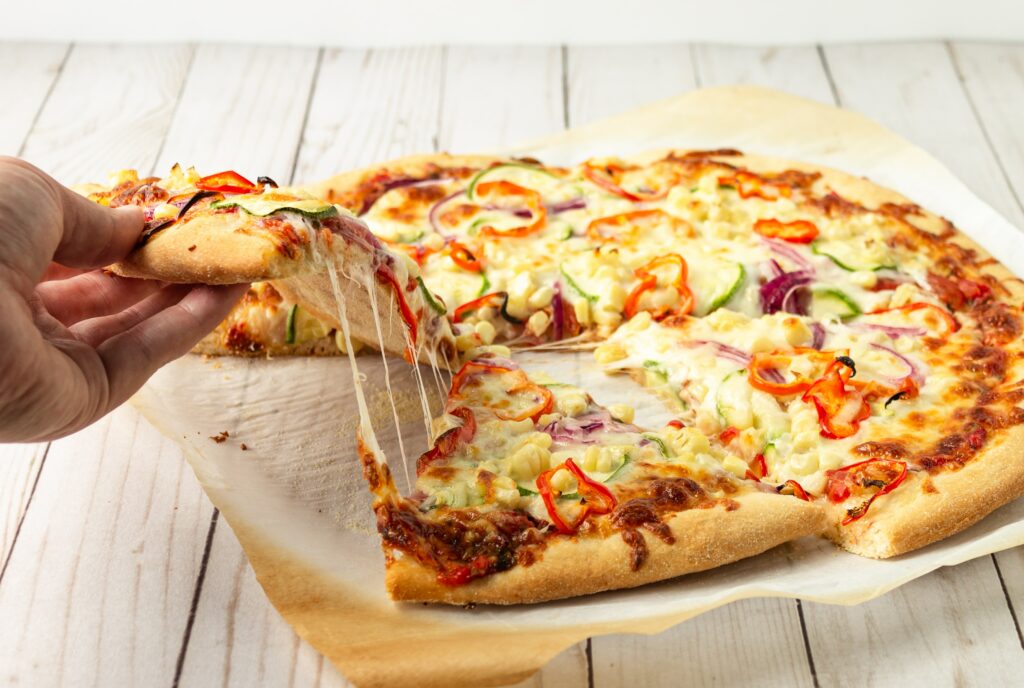
    Vegetarians can eat pizza, as long as there is no meat).

    Plant-Based Diets

    Plant-based diets focus on foods derived from plants, similar to veganism and vegetarianism. However, they offer a more flexibility with the consumption of animal products in moderation. Many who choose this diet eat this way for health or personal reasons, not always for ethical or moral ones like vegans or vegetarians. That’s what makes it a great option for me. I can’t have dairy and choose not to eat meat, but still enjoy a touch of honey here and there. So, my diet remains centered around delicious and nutritious plant-based foods. It’s a win-win for me!

    Believe it or not, I wasn’t always plant-based. In the past, I gave veganism a shot but found that it just wasn’t a good fit for me. As much as I loved the recipes, I loved to wear my UGGs, too. Before I tried veganism, I was a vegetarian for years and ate dairy without realizing it was causing me painful cystic acne. So, I switched to a plant-based diet and it’s been way better for me. I can consume some animal-derived products in moderation, like mayo on my favorite elote—grilled Mexican street corn!

    And if you’re new to plant-based eating, don’t worry! I’ve got an extensive guide to help make the switch a breeze. Whether it’s for health, the environment, or anything else, plant-based eating can be a great choice.

    Final Thoughts

    At the end of the day, it’s all about finding a balance that works for you and your lifestyle. Whether you decide to become vegan, vegetarian, or plant-based, you should always consult with a doctor first. Your personal health should always be a top priority and should be considered first and foremost.

    Overall, each diet has its own unique characteristics and restrictions. Firstly, veganism is the strictest of the three diets and eliminates all animal products, including meat, poultry, fish, dairy, eggs, and honey. Secondly, vegetarianism allows for some animal products, such as dairy and eggs, but still avoids meat, poultry, and fish. And lastly, plant-based diets focus on mostly consuming foods derived from plants, but may allow for some animal products in moderation.

    When deciding which diet is right for you, it’s important to consider your personal values, health goals, and lifestyle. Whether you’re looking to reduce harm to animals and the environment, improve your health, or simply enjoy a variety of plant-based foods, there is a diet that’s right for you.

    So, there you have it! A simple guide to the differences between vegan, vegetarian, and plant-based eating. Remember, the most important thing is to find works for you and helps you feel your best.

    Happy Eating!

    With Love,