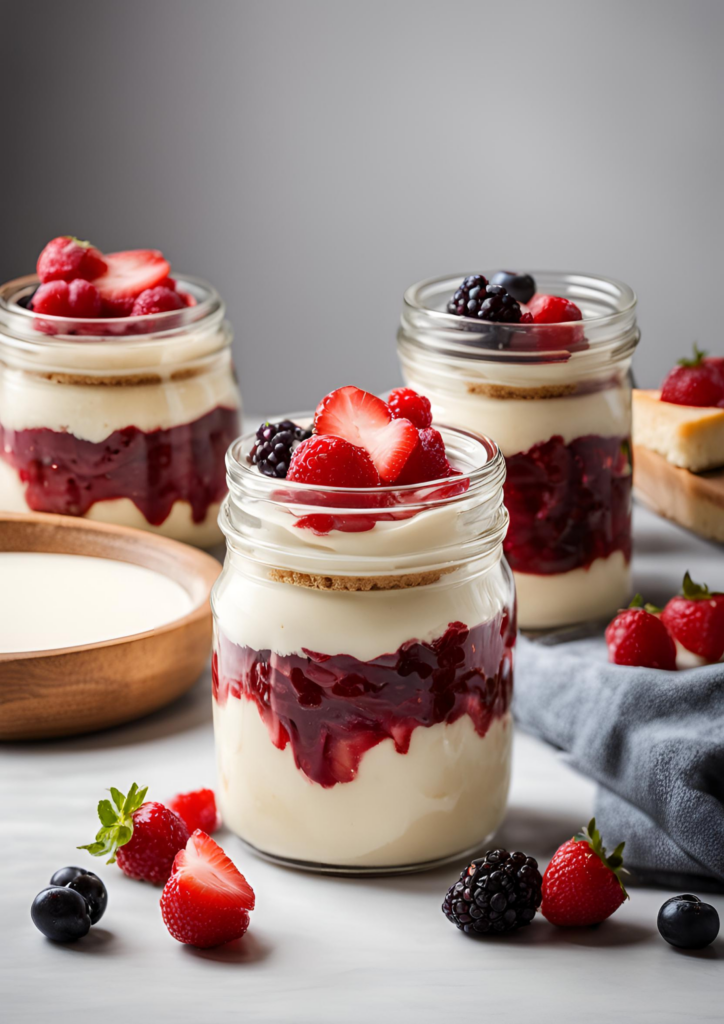
No-Bake Cheesecake Jars: The Perfect Sweet Treat

If you’re a fan of cheesecake but dread the complicated baking process, you’re in for a treat! These No-Bake Cheesecake Jars are the ultimate dessert solution – easy to make, deliciously creamy, and perfect for any occasion. Whether you’re hosting a dinner party, bringing a dessert to a potluck, or just craving something sweet, these cheesecake jars are sure to impress. Let’s dive into the recipe and discover how to whip up this delightful treat with minimal effort!
Why You’ll Love These No-Bake Cheesecake Jars
- No Baking Required: Say goodbye to the oven! These cheesecake jars come together without any baking, making them a breeze to prepare.
- Customizable: You can personalize these jars with your favorite toppings – from fresh fruits to chocolate shavings or even a drizzle of caramel.
- Make-Ahead Friendly: Perfect for busy days, you can prepare these cheesecake jars in advance and store them in the fridge until you’re ready to enjoy.
Ingredients You’ll Need
For the crust:
- 1 1/2 cups graham cracker crumbs
- 1/4 cup melted butter
- 2 tablespoons granulated sugar
For the cheesecake filling:
- 16 oz cream cheese, softened
- 1/2 cup granulated sugar
- 1 teaspoon vanilla extract
- 1 cup heavy whipping cream
For the topping:
- Fresh berries (strawberries, blueberries, raspberries)
- A handful of crushed graham crackers
- Optional: chocolate shavings, caramel sauce, or a sprinkle of powdered sugar
Instructions
Step 1: Prepare the Crust
- Mix the Crust Ingredients: In a medium bowl, combine the graham cracker crumbs, melted butter, and sugar. Stir until the mixture is well combined and has a sandy texture.
- Fill the Jars: Divide the crumb mixture evenly among your serving jars or glasses. Press the crumbs down with the back of a spoon to form a compact crust layer.
Step 2: Make the Cheesecake Filling
- Beat the Cream Cheese: In a large bowl, beat the softened cream cheese, granulated sugar, and vanilla extract until smooth and creamy. You can use a hand mixer or a stand mixer on medium speed.
- Whip the Cream: In a separate bowl, whip the heavy cream until stiff peaks form. This usually takes about 3-4 minutes on medium-high speed.
- Combine the Mixtures: Gently fold the whipped cream into the cream cheese mixture until fully combined. Be careful not to deflate the whipped cream.
Step 3: Assemble the Cheesecake Jars
- Layer the Filling: Spoon the cheesecake filling over the crust in each jar, smoothing the top with a spatula.
- Chill: Refrigerate the jars for at least 4 hours, or until the cheesecake filling is set.
Step 4: Add the Toppings
- Add Fresh Berries: Just before serving, top each jar with a handful of fresh berries and a sprinkle of crushed graham crackers. If you’re feeling fancy, add some chocolate shavings, a drizzle of caramel sauce, or a dusting of powdered sugar.
Tips for the Perfect Cheesecake Jars
- Room Temperature Ingredients: Make sure your cream cheese is at room temperature for the smoothest filling. This helps it blend seamlessly with the other ingredients.
- Whipped Cream Whip: Whipping the cream to stiff peaks is crucial for a light and airy texture. Don’t rush this step!
- Topping Variations: Get creative with your toppings! Try crushed Oreos, a spoonful of fruit compote, or even a sprinkle of toasted coconut flakes.
FAQ
Can I use a different type of cookie for the crust besides graham crackers?
- Yes, absolutely! You can use crushed Oreos, digestive biscuits, or any other type of cookie you prefer for the crust. Adjust the amount of butter accordingly to achieve the right texture.
How long can I store these cheesecake jars in the refrigerator?
- These cheesecake jars can be stored in the refrigerator for up to 3-4 days. Make sure to cover them tightly with plastic wrap or lids to prevent any odors from affecting the flavor.
Can I freeze these cheesecake jars?
- It’s not recommended to freeze these cheesecake jars as the texture of the cheesecake filling may change upon thawing. They are best enjoyed fresh from the refrigerator.
Can I make these cheesecake jars ahead of time for a party?
- Yes, these cheesecake jars are perfect for making ahead of time. Prepare them up to 24 hours in advance and keep them chilled in the refrigerator until you’re ready to serve. Add the toppings just before serving for the best presentation.
How can I adjust the sweetness of the cheesecake filling?
- If you prefer a sweeter cheesecake filling, you can increase the amount of granulated sugar in the filling mixture. Taste the filling before assembling the jars and adjust according to your preference. Remember, the sweetness of the crust and toppings will also affect the overall taste.
Conclusion
These No-Bake Cheesecake Jars are not just easy to make; they’re also incredibly delicious and visually appealing. Perfect for any occasion, they’re a sweet treat that everyone will love. So, gather your ingredients, get those jars ready, and let’s make some cheesecake magic! Don’t forget to share your creations with us – we’d love to see how you decorate your jars. Happy baking!
With Love,


